
Heres Some Camping Tips & Tricks at Your Fingertips
Our Kiefer Campground Blog is the information you need to make your next camping trip even more enjoyable. From RV and camping tips and tricks, to amazing campfire recipes, to advice on planning your next trip... the information below is here to help you. And please, feel free to comment and share your experiences, knowledge and favorite recipes. At Kiefer Campground, we are a family and all here to help each other enjoy the great outdoors to the fullest!

Glow-in-the-Dark Ring Toss
A glow-in-the-dark ring toss game can be a fantastic addition to a nighttime party or outdoor event. Here’s how you can create your own glow-in-the-dark ring toss game:
Materials needed:
- Glow sticks or glow bracelets
- Plastic rings (you can purchase these or make them using plastic piping or foam)
- A flat surface for setting up the game (such as a table or the ground)
- Markers or tape (optional, for marking the throwing line)
- Scissors (if using glow sticks that need to be activated)
Instructions:
- Activate the glow sticks or glow bracelets according to the instructions on the packaging. This usually involves snapping or bending the sticks to activate the chemicals inside that create the glow. Make sure they’re glowing brightly before proceeding.
- Arrange the glow sticks or bracelets into a circle shape on the ground to create the targets for the ring toss. You can make multiple circles with varying distances to increase the difficulty level.
- Mark a throwing line using markers or tape. This line should be a suitable distance away from the targets, depending on the age and skill level of the players.
- Distribute the plastic rings to the players. If you’re using homemade rings, make sure they’re lightweight and large enough to easily toss onto the targets.
- Explain the rules of the game to the players. Typically, players take turns tossing their rings from behind the throwing line, trying to land them onto the glowing targets. Assign point values to each target based on its difficulty level (e.g., higher points for smaller circles or farther distances).
- Keep track of each player’s score as they take turns tossing their rings. The player with the highest score at the end of the game wins!
Remember to play the game in a dark or dimly lit area to fully enjoy the effect. Additionally, ensure that the playing area is safe and free from any obstacles that could cause tripping or accidents. Enjoy your glow-in-the-dark ring toss game!
While camping at Camp Lakewood Campground, try out this special Ring Toss!

Campfire Steak and Potatoes Kabobs
Campfire steak and potatoes kabobs are a delicious and hearty outdoor meal perfect for camping or grilling. Here’s a simple recipe to make them:
Ingredients:
- 1 pound sirloin steak, cut into 1-inch cubes
- 1 pound baby potatoes, halved
- 1 large red bell pepper, cut into chunks
- 1 large green bell pepper, cut into chunks
- 1 large red onion, cut into chunks
- 8-10 wooden or metal skewers
- Salt and pepper to taste
- Olive oil for brushing
- Optional: your favorite seasoning blend (such as garlic powder, paprika, or steak seasoning)
Instructions:
- Preheat the Grill or Campfire:
- If you’re using a grill, preheat it to medium-high heat. If you’re cooking over a campfire, make sure you have a good bed of hot coals ready.
- Prepare the Skewers:
- If you’re using wooden skewers, soak them in water for at least 30 minutes to prevent burning. Meanwhile, thread the steak, potatoes, bell peppers, and onion onto the skewers, alternating between ingredients.
- Season the Kabobs:
- Season the kabobs generously with salt, pepper, and any additional seasoning blend you prefer. Drizzle olive oil over the assembled kabobs and gently toss to coat them evenly.
- Grill or Cook Over the Campfire:
- Place the kabobs on the preheated grill or over the campfire grate. Cook for about 10-12 minutes, turning occasionally, or until the steak is cooked to your desired level of doneness and the vegetables are tender and slightly charred.
- Serve Hot:
- Once the kabobs are cooked, carefully remove them from the grill or campfire. Allow them to cool for a minute or two, then serve hot.
- Optional: Serve with Side Dishes:
- These kabobs are delicious on their own, but you can also serve them with your favorite side dishes like rice, salad, or grilled vegetables for a complete meal.
Enjoy your campfire steak and potatoes kabobs! They’re perfect for enjoying the great outdoors with friends and family.
On your next trip to Camp Lakewood Campground, try this recipe for Campfire Steak and Potatoes Kabobs!
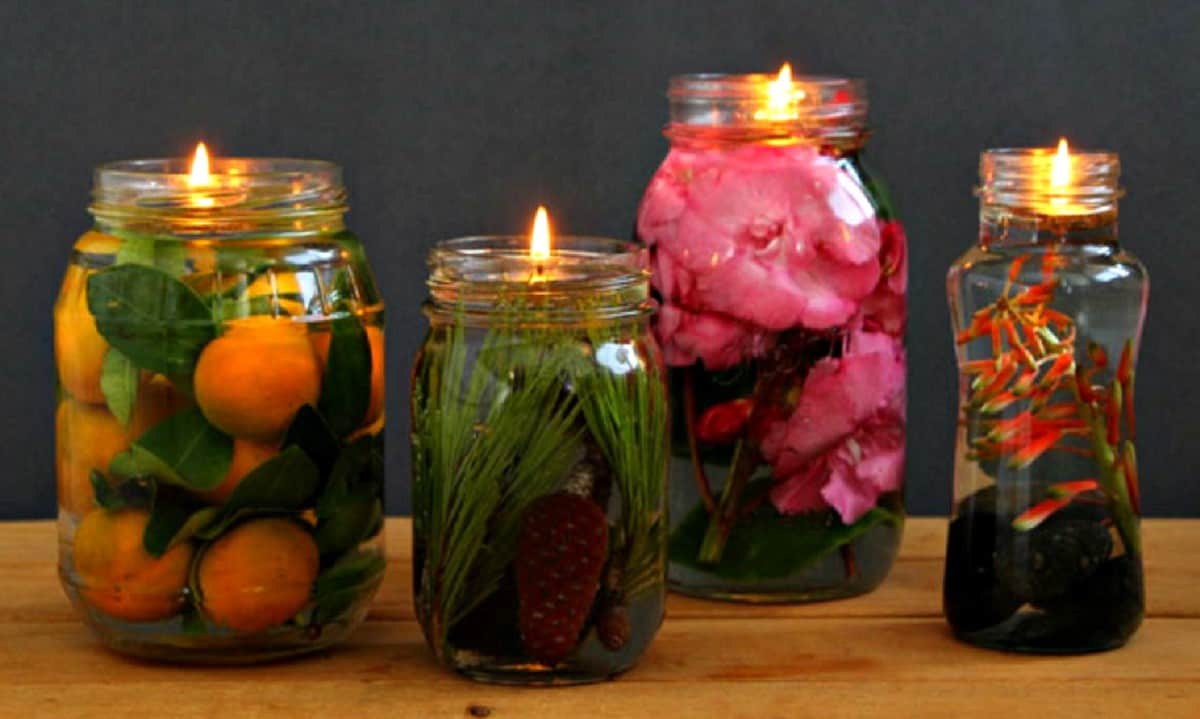
Scented Mason Jar Candle
Creating a scented Mason jar candle can be a fun and creative DIY project. Here’s a simple guide to help you make your own scented Mason jar candle:
Materials:
- Mason jar
- Candle wax (soy, paraffin, or a blend)
- Candle wick
- Wick holder or adhesive
- Fragrance oil or essential oil
- Double boiler or microwave-safe container
- Stirring utensil
- Thermometer
- Optional: Dye for coloring (if desired)
Instructions:
- Prepare the Jar:
- Ensure the Mason jar is clean and dry.
- If you like, decorate the jar with ribbon, twine, or any other decorative elements.
- Secure the Wick:
- Attach the wick to the bottom center of the Mason jar using a wick holder or adhesive.
- Ensure the wick is centered and straight.
- Melt the Wax:
- Use a double boiler or a microwave-safe container to melt the candle wax.
- If you’re using a double boiler, place the wax in the top part and heat until melted.
- If using a microwave, heat the wax in short intervals, stirring in between, until fully melted.
- Add Fragrance and Color:
- Once the wax is melted, let it cool slightly.
- Add your desired amount of fragrance oil or essential oil. The amount will depend on the type and strength of the fragrance.
- If you want a colored candle, add dye according to the instructions on the packaging. Stir well.
- Check Temperature:
- Use a thermometer to check the wax temperature. Different waxes have different optimal pouring temperatures, so follow the recommendations for your chosen wax.
- Pour the Wax:
- Pour the scented wax into the Mason jar, leaving about half an inch from the top.
- Ensure the wick stays centered as the wax cools.
- Cooling and Finishing:
- Allow the candle to cool completely.
- Trim the wick to about 1/4 inch above the surface of the wax.
- Once fully set, you can decorate the jar further or leave it as is.
- Curing Time:
- Let the candle cure for a day or two to allow the fragrance to fully develop.
Now you have your own scented Mason jar candle! Light it up, and enjoy the cozy ambiance and delightful fragrance.
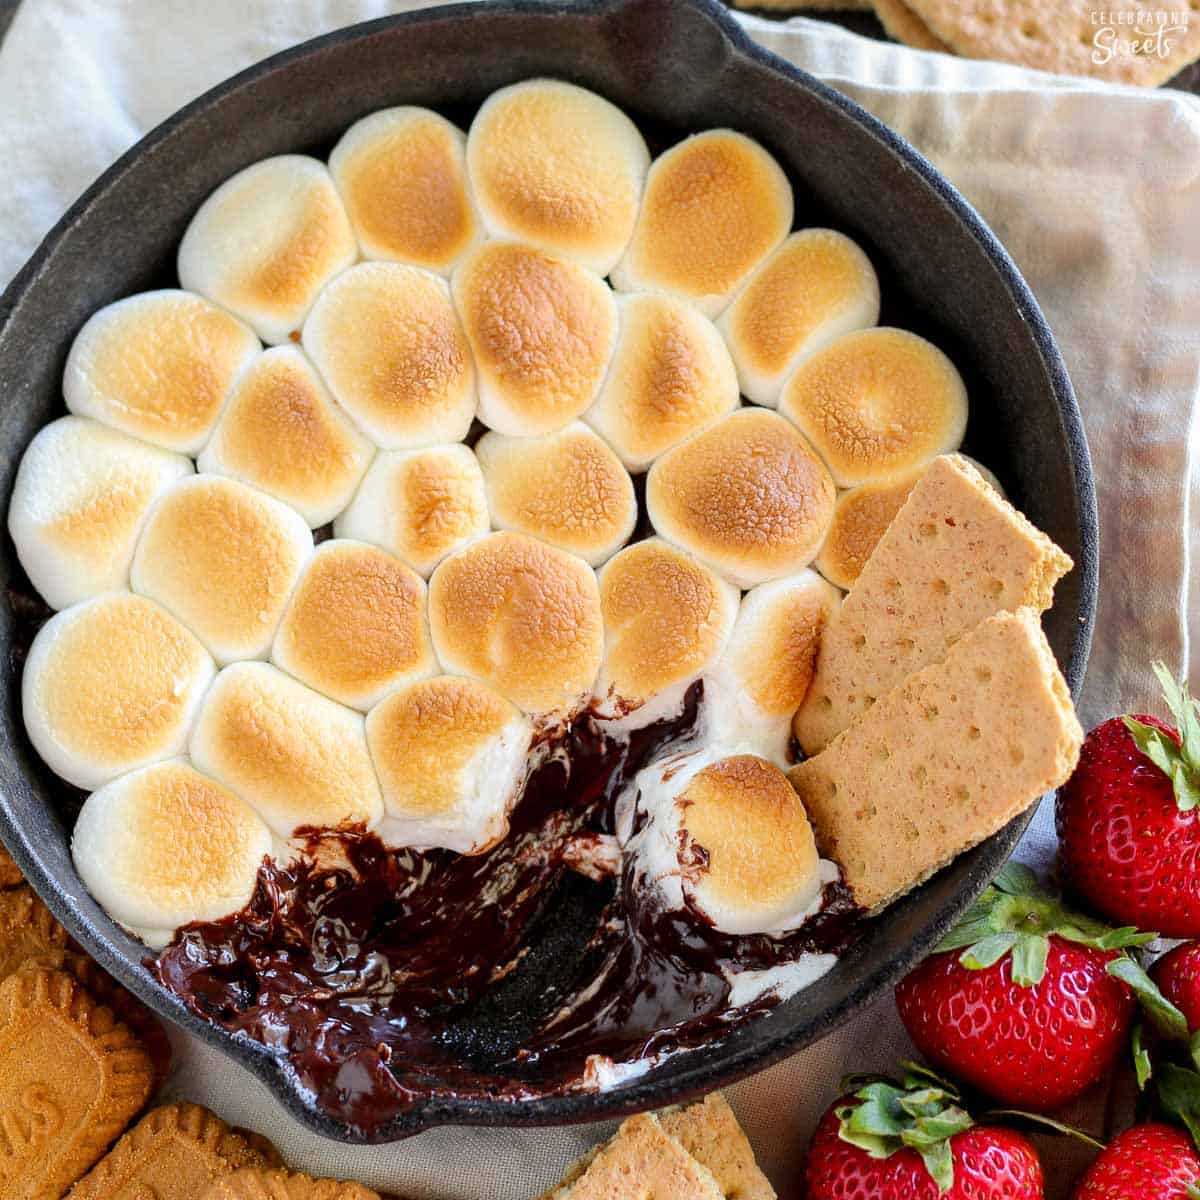
Puffy S’More Dip
It sounds like you’re interested in making a camping-inspired dish called Puffy S’More Dip. This is a fun and delicious treat that brings the flavors of traditional s’mores into a dip form. Here’s a simple recipe for you:
Ingredients:
- 1 cup chocolate chips
- 1 cup mini marshmallows
- 1/4 cup milk
- Graham crackers or cookies for dipping
Instructions:
- Prepare Campfire or Oven:
- If you’re camping, set up a campfire. If you’re at home, preheat your oven to 350°F (180°C).
- Assemble Ingredients:
- In a cast-iron skillet or an oven-safe dish, combine the chocolate chips, mini marshmallows, and milk.
- Heat Mixture:
- Place the skillet or dish over the campfire or in the preheated oven. If you’re using a campfire, you can cover the skillet with aluminum foil to help melt the ingredients evenly. Stir occasionally until the chocolate and marshmallows are melted and well combined.
- Serve:
- Once the mixture is smooth and gooey, remove it from the heat.
- Dip and Enjoy:
- Use graham crackers or your favorite cookies to dip into the melted chocolate and marshmallow mixture.
- Optional: Puff it Up:
- If you want to add a “puffy” element, consider bringing along some pre-made biscuit dough or crescent roll dough. Wrap small portions of the dough around the end of a skewer and cook it over the campfire or in the oven until it’s golden brown. Then, use the puffy dough to scoop up the S’More dip.
This Puffy S’More Dip is a delightful and shareable camping treat that captures the essence of traditional s’mores in a new and creative way. Enjoy your camping adventure and the delicious flavors of this sweet dip!
Share this sweet treat around the campfire at Camp Lakewood Campground.
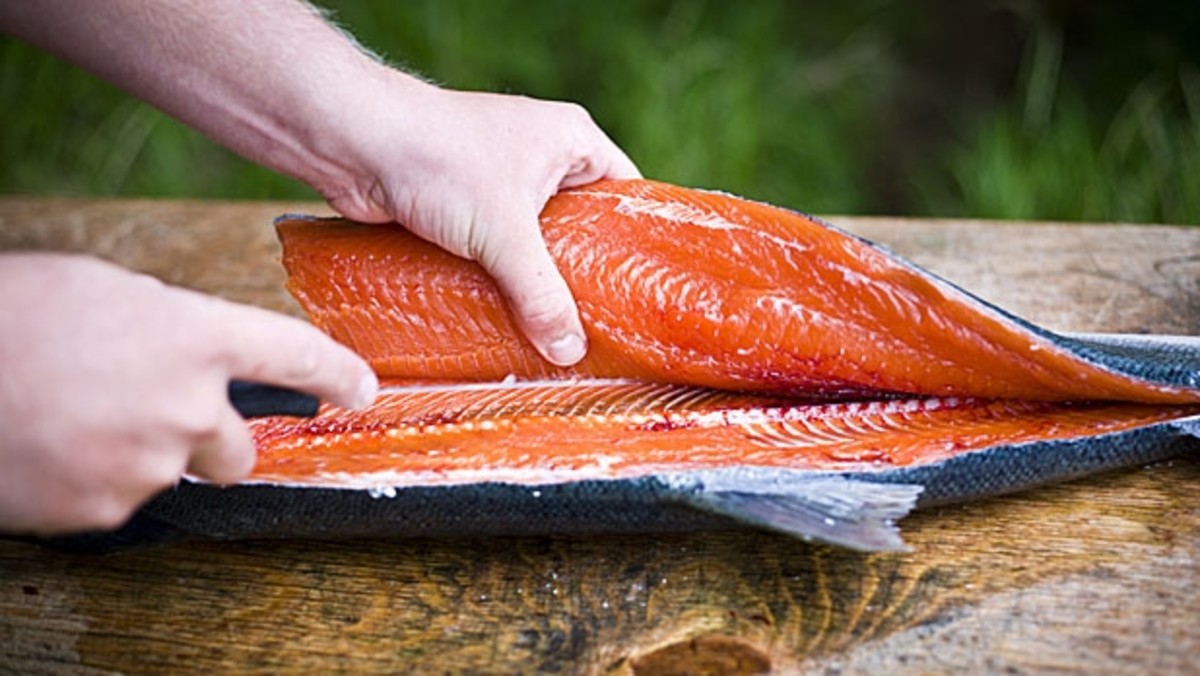
How to Fillet a Fish
Filleting a fish involves removing the bones and separating the edible flesh from the rest of the fish. Here’s a basic guide on how to fillet a fish:
Materials needed:
- Whole fish
- Sharp fillet knife
- Cutting board
- Towel or paper towel
Steps:
- Prepare your workspace:
- Make sure your cutting board is clean and secure.
- Have a towel or paper towel nearby to wipe your hands and the knife.
- Scale the fish (optional):
- Use a fish scaler or the back of a knife to remove scales if the fish is not already scaled.
- Remove the head (optional):
- Some people prefer to fillet the fish with the head on, while others prefer to remove it. If you want to remove the head, cut just behind the pectoral fin and gill plate, angling the cut slightly towards the head.
- Make the initial cut:
- Lay the fish on its side and make a deep, diagonal cut behind the pectoral fin, down to the spine. This cut will be the starting point for the fillet.
- Follow the spine:
- With the initial cut made, turn the knife and run it along the spine, keeping the blade close to the bones. Use smooth, sweeping motions, and let the knife guide along the contour of the fish.
- Lift the fillet:
- As you cut, use your free hand to gently lift and separate the fillet from the bones. Continue cutting until you reach the tail.
- Repeat on the other side:
- Flip the fish and repeat the process on the other side.
- Remove the rib cage:
- Once both fillets are removed, you can trim the rib cage by making a cut along the rib bones on each fillet.
- Skinning (optional):
- If you prefer skinless fillets, you can use a knife to separate the skin from the flesh. Make a small cut at the tail end and hold the skin taut while sliding the knife between the skin and the flesh.
- Inspect and clean:
- Check for any remaining bones or scales on the fillets. Trim away any dark or red meat, if desired.
Final Thoughts:
Remember, practice makes perfect when it comes to filleting fish. It may take a few attempts to become proficient, so be patient and take your time. Additionally, always use a sharp knife to ensure clean and precise cuts.
Try this neat skill on your next camping trip to Camp Lakewood Campground!
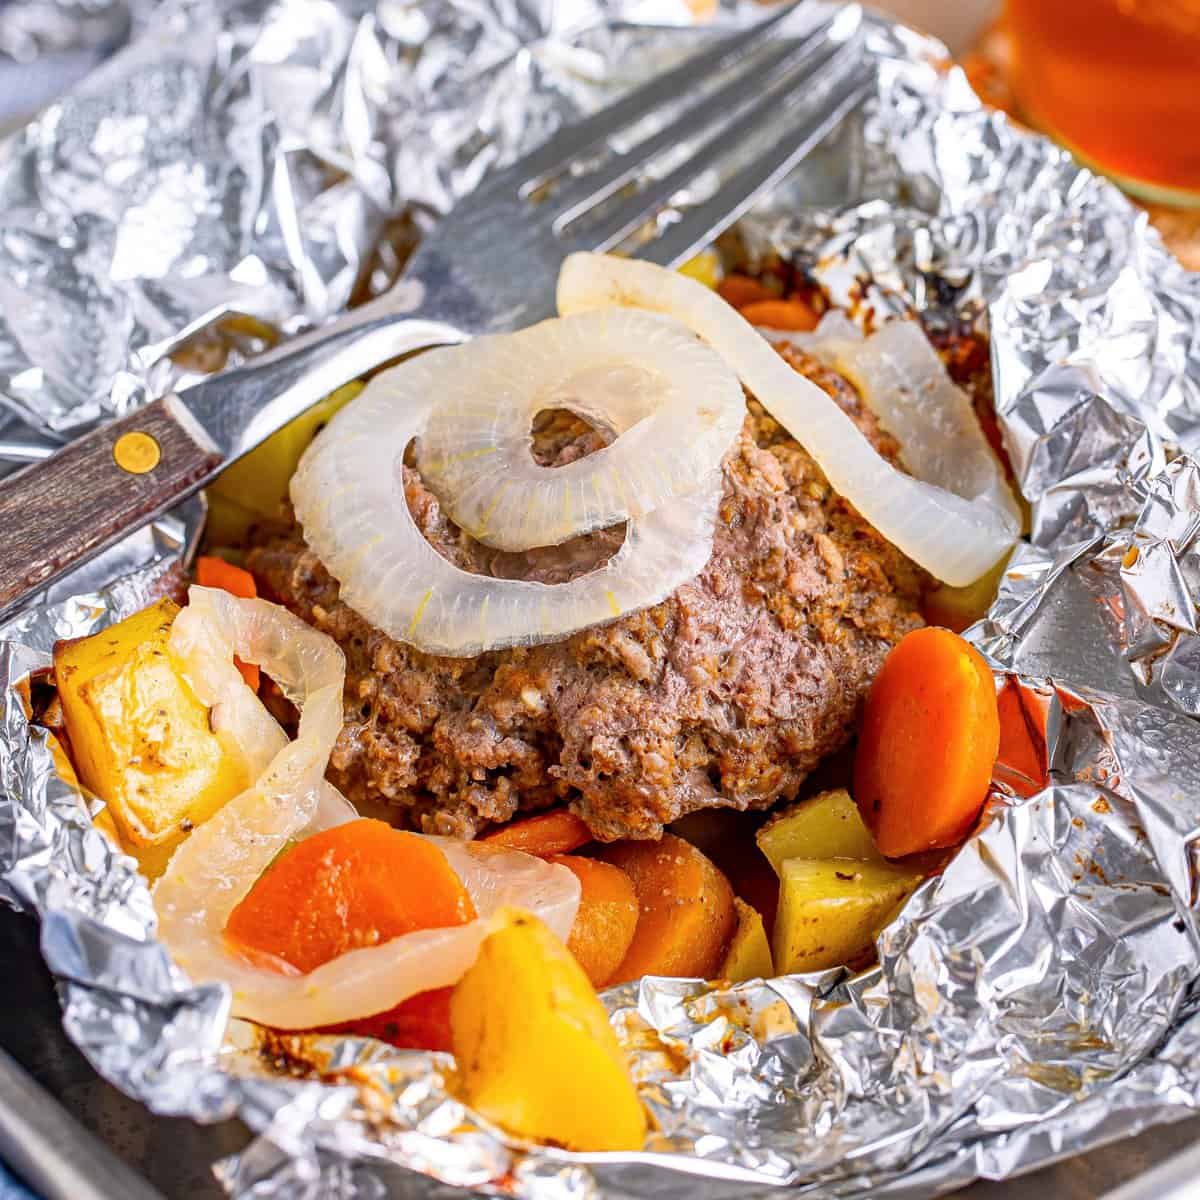
Hamburger Hobo Pack
For a Campfire Hamburger Hobo Pack, you might create a foil packet containing ingredients for a hamburger. Here’s a basic recipe:
Ingredients:
- Ground beef or ground turkey
- Sliced vegetables (e.g., onions, bell peppers, mushrooms)
- Potatoes, thinly sliced
- Salt and pepper, to taste
- Optional: Worcestershire sauce, garlic powder, or other seasonings
Instructions:
- Preheat your campfire or camping stove.
- In a bowl, mix the ground meat with seasonings of your choice.
- Tear off a large piece of heavy-duty aluminum foil.
- Place a portion of the seasoned ground meat in the center of the foil.
- Add sliced vegetables and potatoes on top of the meat.
- Season the entire packet with salt, pepper, and any additional seasonings.
- Fold the foil over the ingredients and seal the edges tightly, creating a secure packet.
- Place the foil packet directly on the campfire grill or in the hot coals.
- Cook for about 15-20 minutes, turning the packet halfway through the cooking time.
- Carefully open the packet (watch out for steam) and check if the meat is cooked through and the vegetables are tender.
Hobo Packs are customizable, so feel free to adjust the ingredients and seasonings based on your preferences. This method is a fun and convenient way to cook a delicious meal while camping.
Try this foil pack on your next trip to Camp Lakewood Campground!

How to Measure the Remaining Sun with Your Hand
Measuring the remaining sun with your hand is a simple and practical way to estimate the time until sunset. This method relies on the fact that your hand span (from the tip of your thumb to the tip of your pinky when fully extended) is approximately equal to 15 degrees of the sky’s arc. Here’s a basic guide:
- Find a flat, horizontal surface: Place your hand perpendicular to the ground, with your fingers extended and held together.
- Align your hand with the horizon: Hold your hand so that the bottom edge aligns with the horizon.
- Count the number of finger widths between the sun and the horizon: Each finger width corresponds roughly to about 15 minutes of daylight. Your hand span, from the tip of your thumb to the tip of your pinky, represents about one hour.
- Four finger widths: About one hour until the sun sets.
- Three finger widths: About 45 minutes until the sun sets.
- Two finger widths: About 30 minutes until the sun sets.
- One finger width: About 15 minutes until the sun sets.
Keep in mind that these are rough estimates, and the actual time until sunset can vary based on your location and the time of year. Additionally, atmospheric conditions and the specific geography of your surroundings may affect the accuracy of this method. It’s always a good idea to use other means, such as a clock or a smartphone, for more precise timekeeping.
You never know when you might need survival tips in case of a zombie apocalypse. Anyway, book your next camping trip at Camp Lakewood Campground!
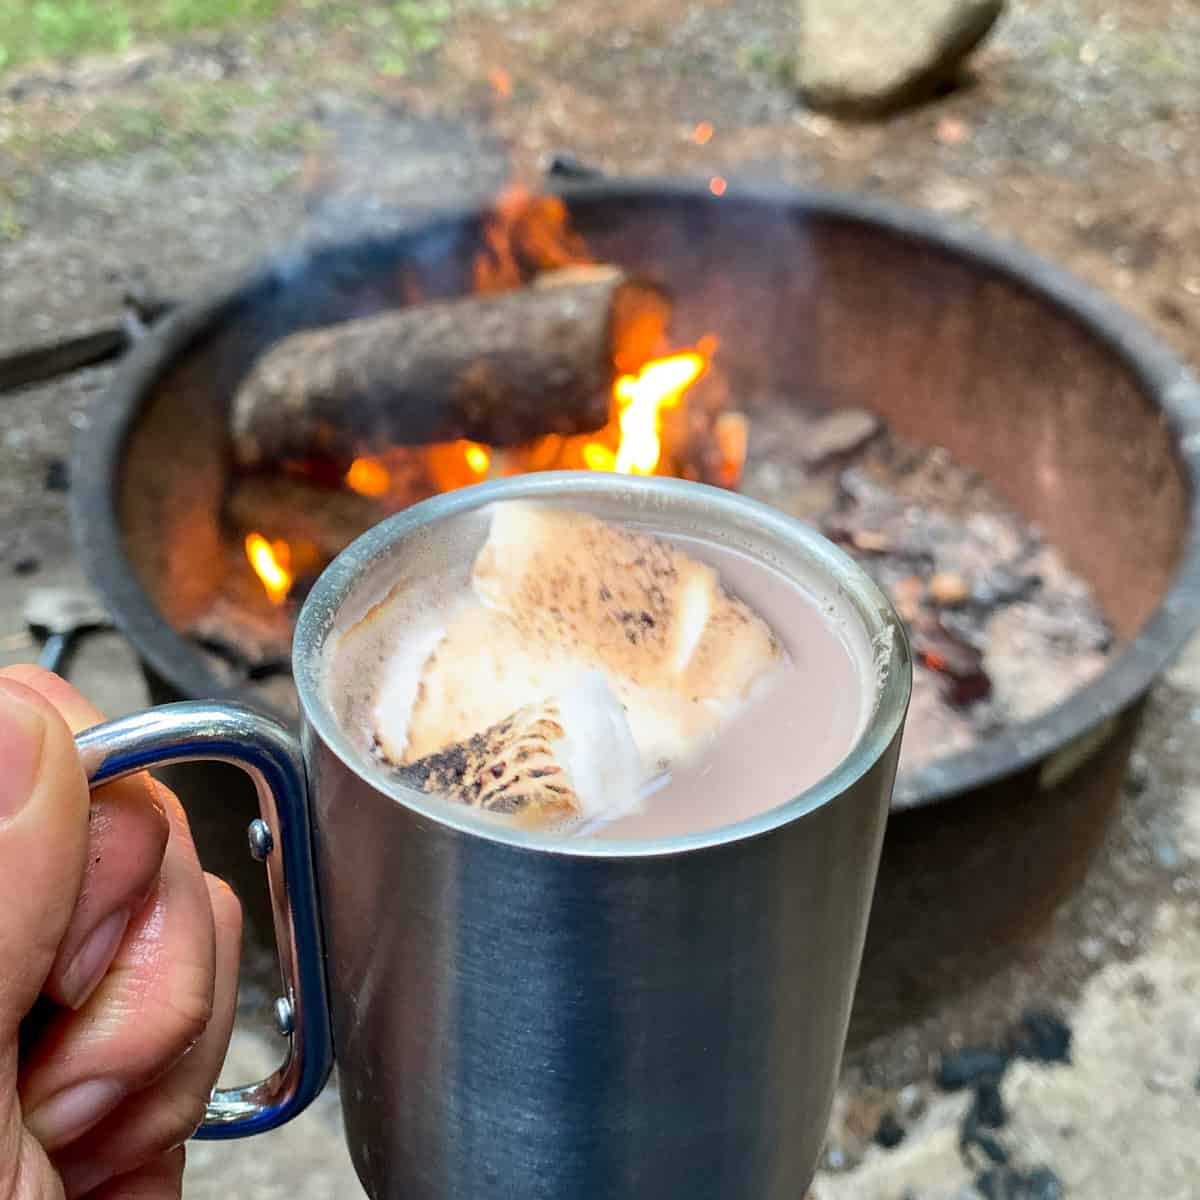
Campfire Hot Chocolate
Campfire hot chocolate is a delightful twist on traditional hot chocolate, perfect for enjoying around a campfire or even at home to evoke the cozy feeling of a campfire experience. Here’s a simple recipe for campfire hot chocolate:
Ingredients:
- 4 cups of milk (whole milk for creamier hot chocolate)
- 1/2 cup of heavy cream
- 1 cup of high-quality semisweet or bittersweet chocolate chips or chopped chocolate
- 1/4 cup of cocoa powder
- 1/4 cup of granulated sugar (adjust to taste)
- 1 teaspoon of pure vanilla extract
- A pinch of salt
- Mini marshmallows, for topping
Optional Add-ins:
- Peppermint extract for a minty flavor
- Cinnamon for a hint of warmth
- Whipped cream for extra indulgence
- Crushed graham crackers for a s’mores-inspired touch
Instructions:
- In a saucepan, heat the milk and heavy cream over medium heat until it begins to simmer. Be careful not to let it boil.
- In a separate bowl, mix the chocolate chips, cocoa powder, sugar, and a pinch of salt.
- Once the milk is simmering, gradually whisk in the chocolate mixture until it’s completely melted and well combined. Continue to heat and stir until the hot chocolate reaches your desired temperature.
- Remove the saucepan from heat and stir in the vanilla extract. If you’re using any optional add-ins, like peppermint extract or cinnamon, add them at this point.
- Pour the hot chocolate into mugs and top with mini marshmallows.
- If you’re by a campfire, enjoy your hot chocolate while basking in the warmth of the fire. If you’re at home, find a cozy spot to savor the deliciousness.
Feel free to customize this recipe according to your preferences. It’s a comforting and indulgent treat that’s perfect for chilly evenings, whether you’re camping or just looking to add a touch of campfire ambiance to your day.
Try this warm-cozy recipe on your next camping trip to Camp Lakewood Campground.

DIY Fishing Hooks
Creating your own fishing hooks can be a challenging DIY project, but it’s possible if you have the necessary tools and materials. Keep in mind that this process can be time-consuming and requires some skill in metalworking. Here are the basic steps to make DIY fishing hooks:
Materials and Tools:
- Wire: You’ll need a suitable wire material. Stainless steel or high-carbon steel are common choices.
- Pliers: Needle-nose pliers, round-nose pliers, and cutting pliers are essential.
- Vise: A vise will help you secure the wire during bending and shaping.
- File or Sandpaper: For smoothing and sharpening the hook point.
- Heat Source: If you’re working with stainless steel, you might need a heat source to soften the wire for shaping.
Steps:
- Select the Wire: Choose the appropriate wire diameter and material based on the type of fish you plan to catch. Thicker wire is typically used for larger fish.
- Cut the Wire: Use cutting pliers to cut a length of wire to start with. The length will depend on the hook size you want to create.
- Bend the Hook: Using needle-nose pliers, bend the wire to create the hook shape. You’ll want a straight section for the shank, a curved section for the bend, and a pointed end for the hook.
- Sharpen the Point: Use a file or sandpaper to sharpen the hook’s point. A sharp point is essential for catching fish effectively.
- Form the Eye: If you want to create a hook with an eye for attaching fishing line or a lure, use round-nose pliers to create the eyelet at the top of the hook.
- Harden and Temper the Hook (optional): If you’re using stainless steel, you may need to heat the hook with a propane torch and then quench it in water to harden it. This step can make the hook more durable, but it requires caution.
- Test Your Hook: Make sure the hook is sharp and strong. You can use a sharpening stone or file to further refine the point.
- Clean and Finish: Remove any sharp edges or burrs from the hook. A clean finish will prevent injury when handling it.
- Optional Coating: You can apply a corrosion-resistant coating or paint to your hook if desired.
Remember that creating your own fishing hooks can be a challenging task, and it may take some practice to perfect the art of making effective hooks. Additionally, some areas have regulations on the use of homemade hooks for fishing, so be sure to check local fishing regulations before using your DIY hooks.
Try this FIY out at your next visit to Camp Lakewood Campground.
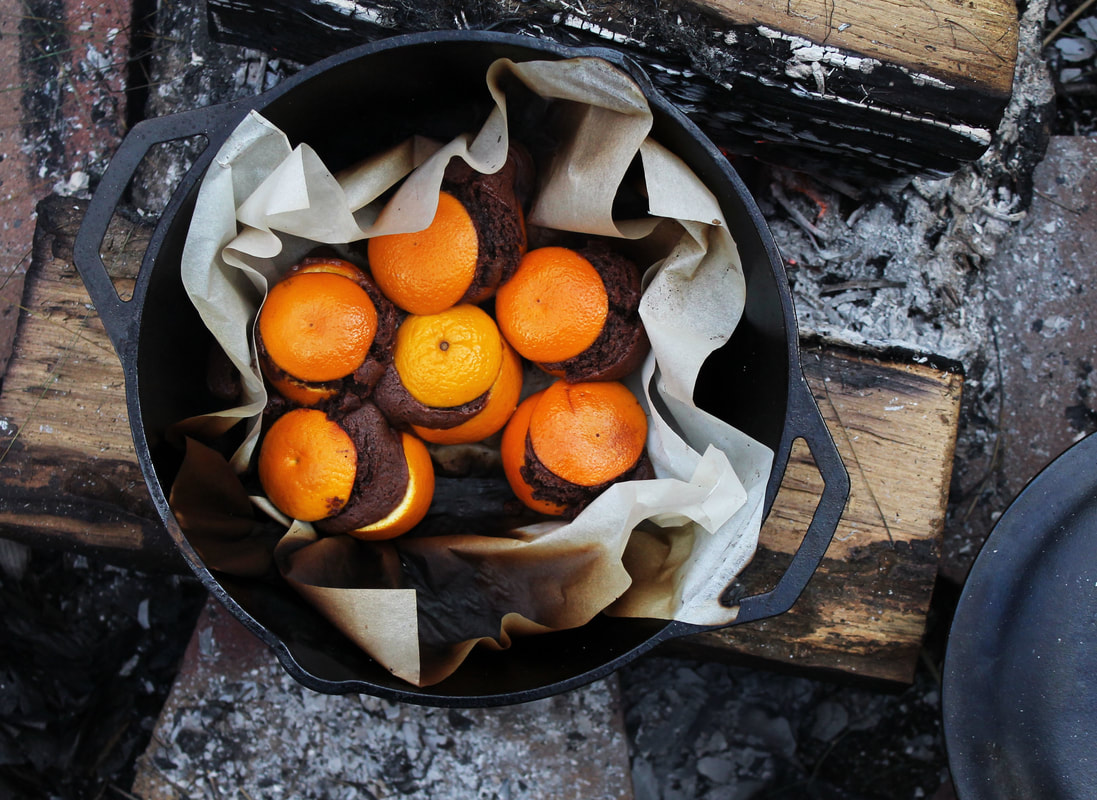
Campfire Orange Cakes
Campfire orange cakes are a delightful and creative outdoor cooking treat. These cakes are typically made by hollowing out oranges, filling them with cake batter, and then cooking them over a campfire. The heat from the fire cooks the cake, and the orange peel imparts a unique and citrusy flavor to the dessert. Here’s a basic recipe to make campfire orange cakes:
Ingredients:
- Oranges (one per serving)
- Cake mix (you can use pre-made cake mix or make your own from scratch)
- Water and any other ingredients required by the cake mix
- Aluminum foil
Instructions:
- Start by cutting the top off each orange. This will serve as a lid for the orange.
- Scoop out the inside of the orange, being careful not to damage the peel. You can use a spoon or knife to help with this process. You want to remove the flesh and pith, leaving just the hollow orange peel.
- Prepare your cake batter according to the package instructions or your favorite cake recipe. This typically involves mixing the cake mix with water (or other liquid) and any necessary ingredients.
- Fill each hollowed-out orange with the cake batter, leaving some space at the top for expansion.
- Place the orange lids back on top of the filled oranges.
- Wrap each orange in aluminum foil. Make sure the foil is securely wrapped around the orange to prevent any leakage.
- Place the wrapped oranges on a grate or in a campfire ring. You can also use a grill over a campfire for more controlled cooking.
- Cook the oranges in the campfire coals or on the grill for about 20-30 minutes. The cooking time may vary depending on the heat of your fire, so check one orange first to see if the cake is fully cooked.
- Carefully unwrap an orange, remove the lid, and check the cake’s doneness with a toothpick. If it comes out clean, the cake is ready.
- Let the campfire orange cakes cool for a few minutes before enjoying. You can eat the cake right out of the orange peel, or you can scoop it out onto a plate or into a bowl.
Campfire orange cakes are a fun and tasty camping or outdoor activity treat that can be customized with various cake flavors and toppings. They’re not only delicious but also a great way to enjoy a sweet treat while spending time in nature.
Try this fun and delicious recipe with your family on your next camping trip to Camp Lakewood Campground!

Family owned and operated, Kiefer Campgrounds strive to offer you the best rates for a comfortable location with outstanding service, and spotless facilities. When you stay in one of our parks, you are no longer just a happy camper, but a part of our family! We are most certain you will enjoy your stay with us. Pick your favorite location and book your spot now before it’s too late! You’ll be happy you did!